The importance of texture baking
Create photorealistic real-time renders.
If you're a product designer or a 3D professional, you know the importance and the struggle of creating that highly polished, great quality final output. Lighting and 3D modeling are crucial, but baking can transform your 3D models into photorealistic wonders. In this article, we will dive deeper into when and how you can use baking to create stunning 3D digital twins.
What is texture baking
Baking is a technique in 3D modeling that generates texture maps with lighting information for 3D scenes. This technique involves rendering a 3D scene with a specific lighting setup and saving the results as texture maps. Baking can significantly enhance scene realism and improve renderer performance. In simple terms, it's like combining the benefits of photorealistic path-tracing rendering with real-time rendering. As a result, your models will look great from any angle.
When to use texture baking
1. Final output
Baking is generally recommended in the final stage of the prototyping phase when you are sure there will not be many changes. Although it is possible to remove a baked texture and generate a new one, doing so can slow down the process. Therefore, it's best to keep a duplicate of the unbaked project as a reserve.
2. Digital twins
If your goal is to have as photorealistic digital copy as possible, baking is the needed approach. However, keep in mind that any interactive or animated components need to be treated separately so they don’t negatively interfere with other objects in the scene.
3. Material and texture presentations
If materials like fabric, leather, or wood play a significant role in your design, having a realistic texture makes all the difference. Choose a material from your custom material library, apply it to the object, and continue with the baking process.
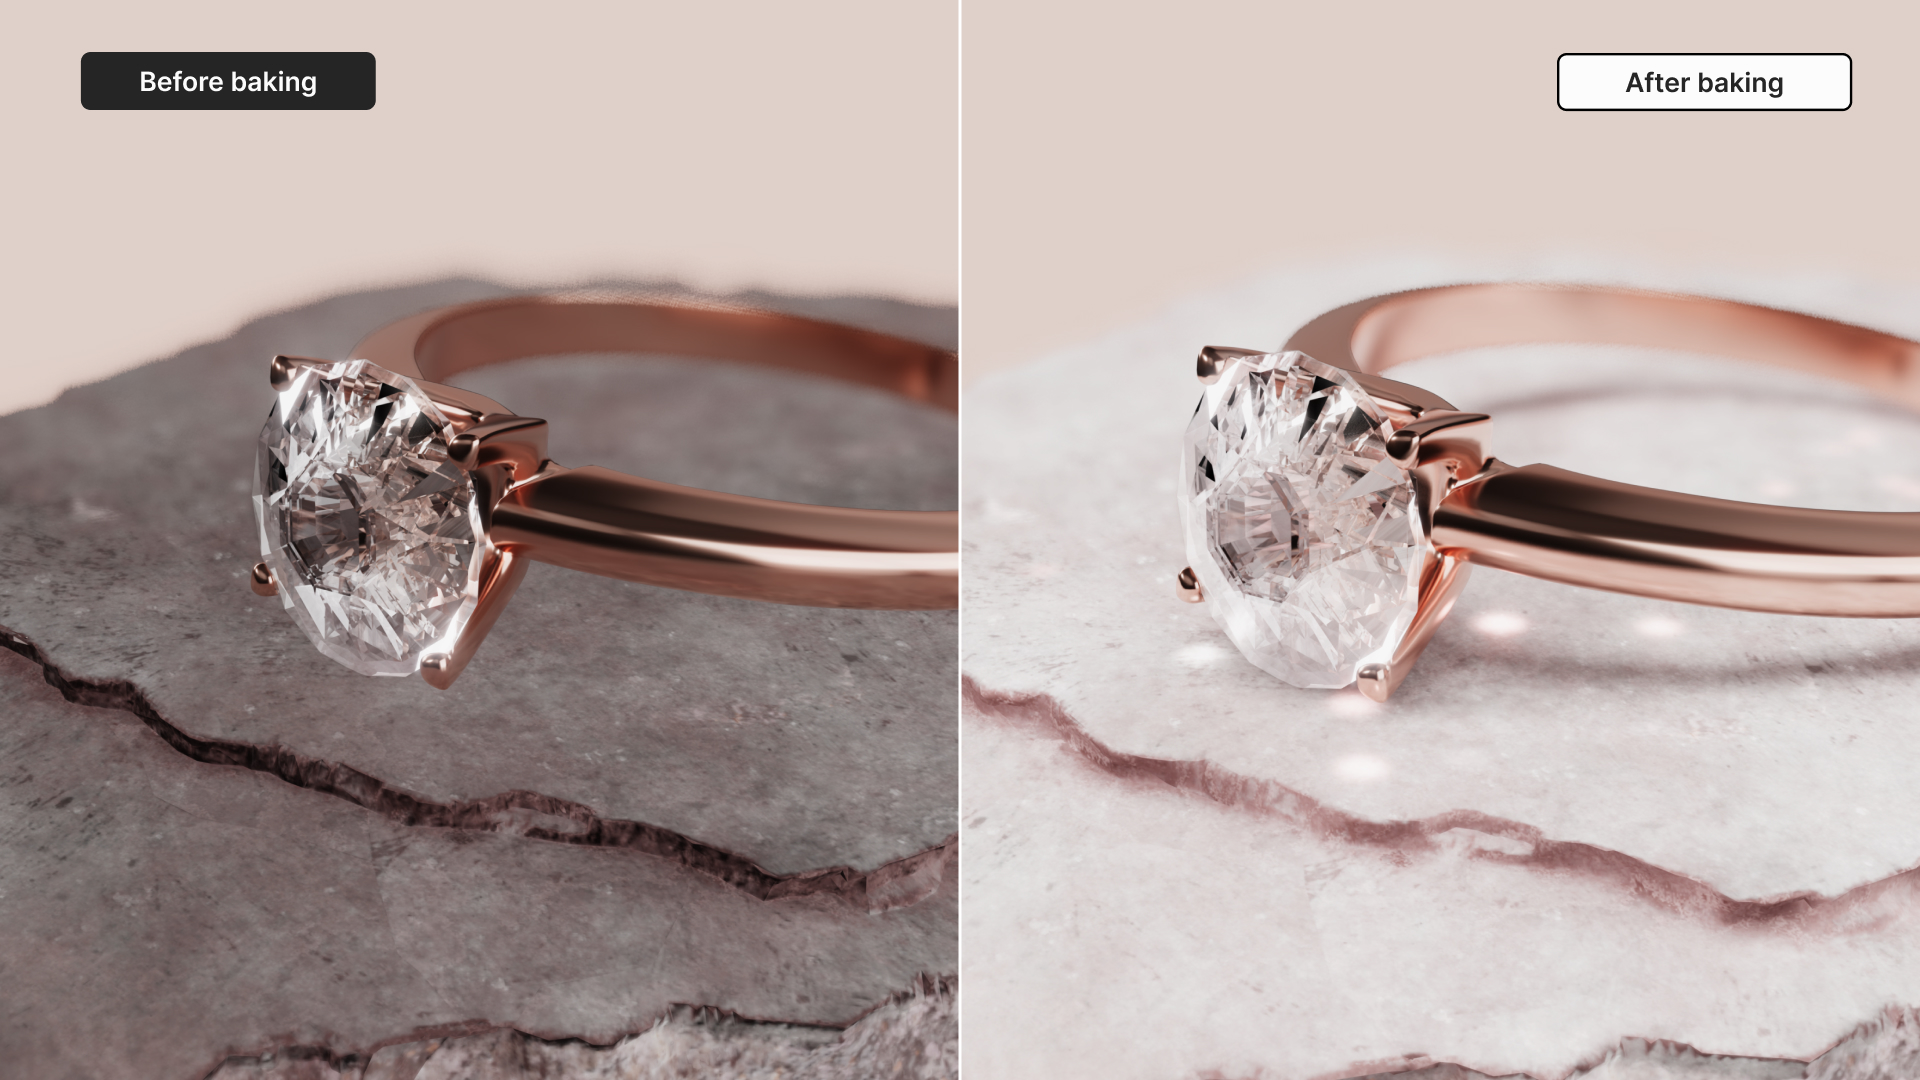
See the before and after:

How to bake lightmaps or ambient occlusion in Vectary
- First, set up the scene with a basic environment light to provide a natural light source and cast shadows, making the scene appear more lifelike.
- Add an additional light source, such as a rectangle light, to provide precise direction and spread of light.
- Preview the lightmap in the Lightmap preview mode and inspect the shadows.
- Select all the objects you want to bake and choose from two baking options in the right panel: Ambient occlusion and Lightmap. Ambient occlusion is calculated based on distance between objects, so it can be calculated even without any light in the scene and the result will be the same.
- Lightmap is far more advanced than Ambient Occlusion and can generate both light and shadow and also take materials in the scene into consideration (e.g. if ball is blue, the plane will be blue as well)
- Choose the right resolution and quality settings. Higher resolutions and quality settings will result in better-looking textures but will also increase the size of the project. Select a resolution and quality setting that creates the best balance for your design.
- Once the settings are chosen, click the bake button to start the process. This may take a few minutes, depending on the size of the scene and textures.
- After the baking is complete, You will see that the shadows are now far more realistic compared to their original state. If you have baked both ambient occlusion and lightmaps, you can enable or disable either one when selecting objects.
- Finally, add effects such as saturation, contrast, and exposure. Tone-mapping presets provide pre-defined settings for adjusting brightness and contrast. You can also add a reflection effect to the scene to create a mirror-like appearance on reflective surfaces.
Tip: Once the texture is baked, moving an object that was throwing shadows will leave a dark spot where the shadow previously was. If you plan to add interactions and animations to your scene, make sure they don't interfere with other objects by baking moving parts separately.
Join our Discord channel to learn more about baking and get tips from our community and learn more about baking in our documentation.